

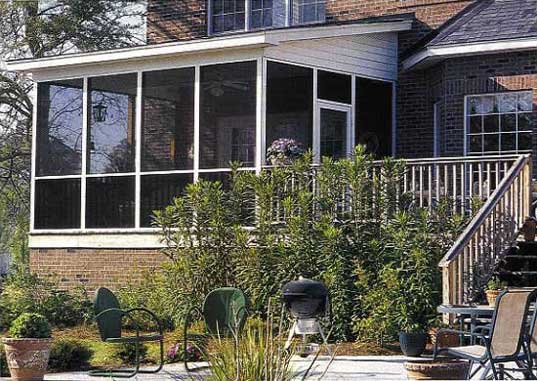
How To Install Screened In Porch
Screen Tight is the better manner to supersede or install porch screening.
Article from Today's Homeowner (now This Old Business firm). Past Joseph Truini.Photographs by Don Taylor.
The traditional method of screening a porch has pretty much remained the same for a hundred years. That's unfortunate, because it'due south a flawed system. Pocket-sized tacks or staples are used to attach the screening to the porch posts and railings. Then, narrow wood battens are nailed up to conceal all of the seams and fasteners.
It's a labor-intensive method, and screens installed this way typically develop noticeable sags after just a few months. Plus, when information technology'southward necessary to replace a damaged screen or fix a sagging one, you must remove several battens and yank out about a million fasteners. But there is a much better and easier fashion to install screens, and information technology doesn't require a lot of experience. This "Weekend Project" will testify you how to re-screen an existing porch using the Screen Tight screen porch system.
You tin can use the same techniques detailed here for a DIY screening solution to new and remodeled patios, deck enclosures, breezeways and gazebos.
Screen Porch System Summary
Screen Tight is a cleverly designed, all-vinyl system that consists of two main components: a blackness base of operations strip and a snap-on cap trim, which comes in white, greyness, beige and brown.The base strip is screwed in place around the perimeter of each opening that volition be screened. It comes in 8- and 12ft. lengths, and in two widths for attachment to two×4 and four×iv framing. Molded into the surface of the base of operations strip are two grooves, which accept the safety spline that secures the screen in identify. In one case the screens are installed, the cap trim is snapped on to muffle the base strip and screen spines.
You can use either fiberglass or aluminum screening, although fiberglass is a meliorate choice because it'southward easier to handle, stretches tighter, and is less expensive. Fiberglass screening, sold at home centers and hardware stores, starts at fifteen cents per foursquare human foot; aluminum costs 25 cents per square human foot.
Related: Compare all of our Screen Porch Systems
Removing The Quondam Screens
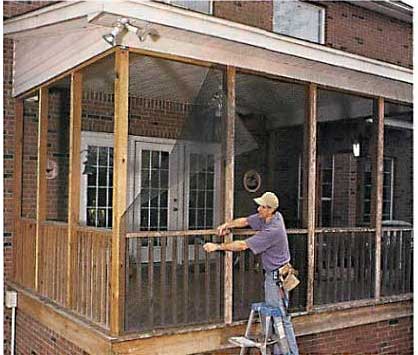 Offset by using a hammer and apartment bar to pry off all the forest battens nailed to the porch framing. On our porch, we removed the horizontal i×2 battens get-go, then yanked off the vertical 1×iv battens that were nailed to the 4×4 posts.
Once you have removed the battens, cut down the one-time screens with a utility pocketknife. There will be many former tacks and staples left behind, which you lot can either pull out with pliers or tap flush with a hammer. Nosotros employed both methods to create flat, smoothen surfaces.
Pull downwards all the one-time screening and pound the staples flat.
Fastening the Base
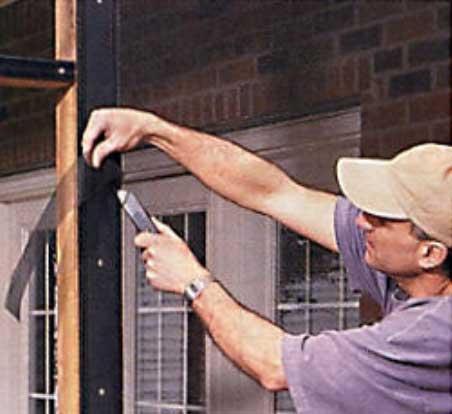
 Adjacent, spike a vertical base strip to each porch post with 1-in. screws. Put a single screw in each prepunched slot and ano
ther one in ii in. from each end of the strip. The screws should exist driven snug simply not then tight that they deform the vinyl strips. Fasten the vertical base strips to the outside of the porch posts. Utilize the iii ½ -in.-broad base of operations for 4×4 posts. Employ pruning shears or tin can snips to trim the base strips to length. Screw 1 ½ -in.-broad base of operations to two×4 track.
Then, screw the horizontal base strips to the framing that spans betwixt the vertical posts. Trim the strips to length with pruning shears. They tin can also be cut with can snips, a hacksaw or a power miter saw. Install the remaining base strips, making sure to drive a screw through each slot and 2-in. from each end.
Installing the Screen
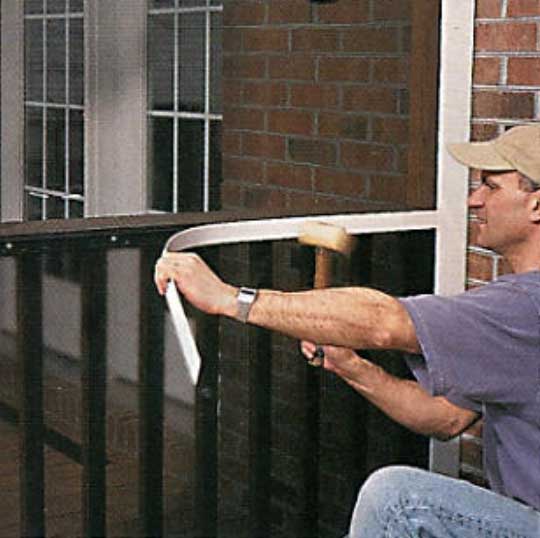
 Pull the screen fabric tight with one hand as you roll the spline into the groove of the base strip.
We installed Phifer Wire's standard black fiberglass insect screening in the openings in a higher place the handrail. Below the railings and on the porch door, we installed Phifer's new PetScreen (55 to 68 cents per square foot), a durable material that resists tears and punctures from pet claws. This vinyl-coated polyester is much stronger that standard screening.
Fiberglass and aluminum screening come in a multifariousness of colors. Withal, black screening is typically the all-time option for porches and doors because information technology'due south less reflective and offers much better visibility than lighter colors, particularly bare aluminum.
Tips for Screen Rolling
Installing screening with a spline roller isn't difficult, but it does take a sure amount of practice before y'all can do it rapidly and effortlessly. Proceed these tips in mind:
- Ever install the tiptop border of the screen offset, followed by the two sides and finally the bottom edge.
- Pull the screen taut wit one mitt as you lot gyre the spline into the groove with the splining tool. If y'all create a contraction or fold in the screen, pull out the spline and start again.
- When securing the bottom edge of the screen, check to brand sure the screen is flat, wrinkle-free and relatively tight.
- If it isn't drum-tight, don't worry. When you snap on the cap trip, the screen volition tighten up quite a bit.
- Trim off the excess screen with a sharp utility knife (Photo vi). Work slowly and with bang-up caution; one small skid and you'll slice open the new screen.
Snapping on the Screen Tight Cap
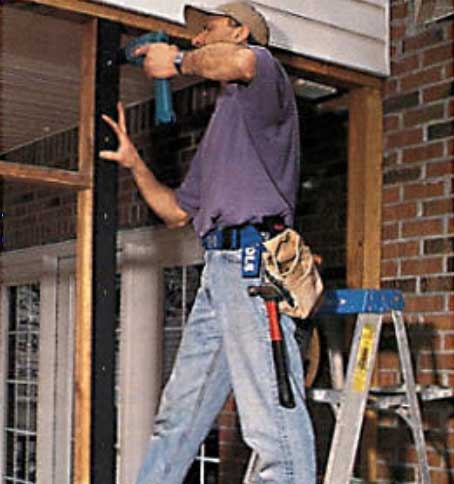 Align the cap with the base strip, then strike it with a plastic or condom mallet until information technology snap-locks into place. Use the same method to install horizontal cap trip along the acme and bottom of the walls, and forth the acme and lesser of the walls, and along the handrails. Allow these pieces run long, then trim them to length with pruning shears.
Cut the narrow, horizontal cap trip to length with pruning shears subsequently tapping it onto the base of operations strip. Cover the base of operations strips and screen splines on the four×4![]() porch posts with long pieces of wide cap Screen Tight trim. Apply a non-marring mallet to tap the narrow cap trim onto the base strips that are screwed to the ii×4 railing.
porch posts with long pieces of wide cap Screen Tight trim. Apply a non-marring mallet to tap the narrow cap trim onto the base strips that are screwed to the ii×4 railing.
Apply Finishing Touches
Afterward screening in the upper portion of the porch wills, repeat the process on the lower half. If you've got a dog, or cat (or both), consider installing a more durable screening to the openings below the handrail and a screen door with a pet door congenital in. Once all the screening is up, install the cap trim, starting with the vertical pieces.
Later on nosotros completed screening in the porch, we hung the new vinyl screen door which perfectly matched the brilliant-white cap trim.

Source: https://www.screentight.com/2015/07/10/screentight-diy-screened-porch/
Posted by: jenkinsthaddle.blogspot.com
0 Response to "How To Install Screened In Porch"
Post a Comment